This weekend she told me she was making a Triple berry red velvet cake with homemade cream cheese frosting. I told her if she took pictures I would put her on my blog, so here is her guest post:
One of the ladies in my Bible study just moved into a new house with her son, and monday we're going to have a potlatch (so strange that's said pot-luck!) and bless her house and I'm bringing dessert. Because I'm house-sitting (and the lady does NOT bake, therefore is missing MANY ingredients in her pantry!) I decided to do something semi-homemade (Please don't submit this to cakewrecks!)
I chose to do a Red Velvet Cake with Homemade Cream Cheese Frosting. Because I used a box mix, I spent a little more and bought the Duncan Hines Red Velvet Cake. My first issue was that she did not have a single cake pan! Are you KIDDING me?! Anyway, I wound up using two comparably sized glass pie pans. The box said to spray the pan AND dust with flour, which I did. I usually don't use cooking spray, I just use oil and coat the pan, but I figured with the flour it probably didn't matter. I used Crisco Olive Oil cooking spray and Unbleached flour in the pans.
Then I whipped up the cake mix. This lady has an old 70s Stainless Steel Sunbeam Stand Mixer (kind of cool!) The cake called for 1 1/4 C water, 1/3 C vegetable oil, and 3 large eggs, blend on low until moist, beat on medium 2 minutes
[ I, Emily, Just LOVE this picture-- Amy could be a food photographer! Don't you think?]
The recipe calls for it to be baked immediately, thankfully I'd already preheated my oven to 350, so I poured the batter between the two pie pans and popped them in her rather small wall oven. After 20 minutes I had to rotate the two pans because the outside edges were browning beautifully but prematurely.
Before:
Once they were done baking about 34 minutes total, I pulled them out of the oven and let them set for five to ten minutes before flipping them onto the granite counter and letting them cool. If you don't have granite or quartz this is NOT a wise idea, as there's red food coloring in the cake mix and it WILL stain laminate or solid surface or cement, it also stained my fingers, and on that note, wear an apron! As I didn't and well, my shirt showed it :) Thankfully I wore a black tank and didn't get any of the food coloring on my shirt.
Because I somehow didn't oil the pans enough, I didn't have to cut one layer level, the bottom fell off and it leveled itself. Oops? (Yay cake remnants for eating! Maybe.... I may actually work them into the recipe!)
As they continued to cool, I whipped up cream cheese frosting, again using that super cool vintage mixer :) Here's the recipe. I doubled the original, so here's what I actually made :)
1 8 oz package Cream cheese softened
1/2 C butter softened
2 tsp vanilla
4 C powdered sugar
2-4 tsp milk to consistency
Beat cream cheese, butter, and vanilla on medium speed until light and fluffy. Gradually add powdered sugar, beating well. If necessary, gradually beat in milk to reach spreadability.
Because I'm not at home and have no clue where to find a cake serving plate, I decided to use a decorative pie stone dish that was easily found, I put one layer of the cake in the bottom and generously frosted it.
Meanwhile I threw a pizza in the oven, a girl can't subside on cake batter and frosting fingers!
I then beautifully arranged blueberries, blackberries and raspberries on the frosting and gently pushed them into the frosting a little.
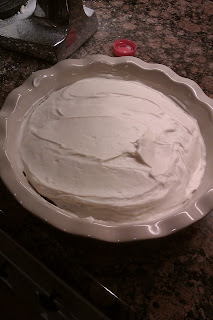
Next, I placed the top layer on and frosted the top and sides (also generously!) And then also arranged more of the berries on the top :) And quick pulled my pizza out because I forgot about it!
Remember that broken cake I said might come back into play? Yeah, here it comes, I crumbled it up between my fingers and palms and just graced the sides/edges of the cake
That's how I made a triple berry semi-homemade red velvet cake :) Now, I just need to figure out how to get it to the potlatch without ruining it.... But that's to be pondered later, I have a pizza to devour :)
OH! Before I forget, put the cake in the refrigerator if you're going to leave it overnight and take it out an hour before serving. Enjoy!


sadly i cannot see any of the pictures. maybe it's my browser or my connection. :(
ReplyDeleteI can't see them either. :(
ReplyDeleteThey should be fixed now!
ReplyDeleteThank you so much for letting me be a guest blogger! I hope everyone can see the pics now!
ReplyDelete