Showing posts with label cake. Show all posts

Friday, October 19, 2012

Heaven in a paper liner: Triple Chocolate Cupcakes.

Let's talk about the look in my eyes. What caused that?
Photo: Magical! 

Maybe I've been single too long. 
Maybe Grad school has made me crazy.
Maybe since I only ever hang out with girls (there are only 2 guys in my program, one married, one engaged)
Maybe it's because there is no cocoa bean, no sweet tooth fairy, no sprinkles, no creme de la creme. There's just me and my oven that cooks 25* hot... 

But I think the look in my eyes is because that cupcake I'm gazing at lovingly is likely the best thing that has passed through my lips since daddy took me to Brio, and even that's comparing apples and oranges. 

I shared these with people in my program, the local sister missionaries, and all of my professors... who has brownie cupcake points. This girl!!

Direct quotes:
"Zimmerman, I've had cupcakes from big fancy cupcake places, including Sprinkle's cupcakes, yours could stand up to any of them" -Wilkerson (who I later found out is diabetic... oops!)
"I tried to steal Wilkerson's before he realized what he had been given"- Wendy, the dept secretary
"I don't even like chocolate cake and that was the best cupcake I have ever eaten"-- Swift, department head

A real conversation:
Me, bearing cupcakes: "Happy International Chocolate Cupcake Day!"
Swift: "Ohh, we like Zimmerman."
Weems (graduate school dean): "But we didn't realize how much till just now"

So yeah. These are AMAZING. AND! I can't find the link for the recipe!! But! Never fear. In order to make them without getting my computer dirty, I wrote out the recipe! Unfortunately it means I can't site my source. But whoever you are. My mouth (and half of the population of Portales) thanks you!

Without Further Ado:

Milk Chocolate Cupcakes:

2/3 cup butter
1 3/4 cup brown sugar
3 eggs
1/4 c sour cream
1 cup milk (I forgot to put this in the recipe and when I was making these for to impress someone I couldn't figure out why the batter was so darn thick!) 
1 1/4 c cocoa powder
1 1/4 c flour
3/4 tsp. baking powder
1/4 tsp salt
1/4 tsp baking soda

Cream butter and brown sugar, add eggs and sour cream, and milk; mix till smooth. Add dry ingredients and mix till just combined. 
Fill 24 lined cupcake tins. (I know sizes/how full you like them varries, I ended up with 24 cupcakes and glass ramekins filled with deliciousness). 
Bake at 350* for 17-19 minutes. I've quit poking my cupcakes to check for doneness, I just tap the tops, if they stay depressed, not quite done. If they spring back up, perfect! 
Let the cupcakes cool COMPLETELY. (I made them before I went to institute for an hour and a half or so. They were cool when I got home)

Dark Chocolate Ganache Filling
(yup, you read that right. Don't let that Ganache word scare you-- it's easy peasy!)

1 1/2 cups dark chocolate chips
1 cup heavy cream 
1 t vanilla

Mix all in a microwaveable bowl. Heat in microwave for about a minute on medium-high power, then mix it until it is smooth. At this point I let it sit for a few minutes to thicken to make it easier to work with. 

See what I mean! Easy. 
CHECK OUT THAT GANACHE! MMMMMMM. And also the cake texture. Perfect!

White Chocolate Butter-cream Frosting

Look close at the frosting! It's PERFECT. Light. Airy. Delicious!

1 cup white chocolate chips
2 sticks (1 cup) butter at room temp
6 cups powdered sugar
1 Tbsp Vanilla
2-4 Tbsp milk

Melt chips completely in microwave. (Heat on 50% power for a minute, stir. If not melted, put back in the microwave for 30 second increments on 50% power). 
Beat the white chocolate chips in with the butter till nice and creamy. 
Add powdered sugar and vanilla.
Slowly add just enough milk to get the right consistency. 

Assembly:

Take a serrated knife and cut a hole in the tops of the cupcakes (for me this wasn't a precise science, I just tried to make a hole that would allow enough ganache to make it worth while, you know?) Some bakers put tops over their filling, but why? It's going to be covered in frosting anyway... Use the tops for... snacking? Cakeballs? Feeding the ducks? 

Spoon the slightly thickened ganache into the hole made in your cupcake. 

You can always frost with a knife, but I like easy... so I put the frosting in a disposable piping bag, cut the tip off of it and piped an easy swirl on top of all 27 cupcakes! 

I put on chocolate sprinkles just for fun. 

Use these cupcakes to win friends and influence people. 

Or as a substitute for a love life... who needs men when you can have cupcakes.... (oh dear, but seriously)


Photo: Magical!


Also, for easy transportation/mess fee use short clear Dixie cups. They're perfect size! You could even cover them, if you are ambitious. 

Tuesday, October 11, 2011

Let them eat Cake...

One day, we were eating dinner, and there was a knock on the door. I forced the kids to stay seated and I answered it. It was my neighbor and his then 6 year old son. With a little prompting from his dad, Zach said in one breath "Miss Emily, would you make my birthday cakes? I want one with Thomas and one with Lego Prince of Persia Sands of Time like this picture." Then he showed me a Prince of Persia Lego set instruction manual. This was long before his actual birthday (maybe a month in advance). The Thomas cake was for his family party and the Prince of Persia for his friend party.

Here's how the Thomas one came out-- it made me want to have a boy child who loved Thomas so I could make them this cake:


Tell me that's not adorable!

Also, it was my friend's daughter's birthday, so I made her cupcakes too... (I just like baking, ok?) And they turned out SUPER CUTE! I just used extra frosting from the Thomas cake, so there are some funky colors (like where the blue and red frostings were next to each other...) but how cute are these owls? 


I especially like the ones with the pretzel rod twig! It's sweet, chocolaty, salty, gummy, delicious and super easy! 


Saturday, June 18, 2011

Yes! It is as awesome as it looks! Rainbow Cake with lemon curd filling and whipped cream frosting.

So The family I work for had their Aunt Mary come into town and it was her 70th birthday! (Also, K's been going CRAZY at home with her broken leg.) So we decided to go all out on the cake!

I'd seen the rainbow cake a long time ago, and thought it might be time to pull it out! I followed Oven Love's link to Wisk Kid: Say it with Cake and used it for our cake recipe!

White Cake (but not really)


2 sticks (226 g) butter, room temp
2 1/3 c (466 g) sugar
5 egg whites, room temp
2 teaspoons vanilla
3 c (375 g) flour
4 tsp baking powder
½ tsp salt
1 1/2 c (355 g) milk, warmed for 30 sec in microwave to bring to room temp
Red, orange, yellow, green, blue and purple GEL food coloring. Liquid will not be vibrant enough!

Preheat the oven to 350F degrees. Oil and line well! how ever many 9” cake pans you have (We had 2 and just reused them).

Sift together the flour, baking powder and salt. Set aside.

Cream the sugar and butter, then add the egg whites (I cracked them all into one bowl) and add them a little at a time. Add the vanilla and mix until fully incorporated. Then, alternating between wet and dry, add the milk and flour mixture in two parts.

Divide the batter amongst 6 bowls and then whisk a fair amount of the appropriate food color into each bowl. Keep in mind that the color of the unbaked batter will be the color of the baked batter. Pour into the pans and bake for 15 minutes each.

When you remove them from the oven, let them rest on the cooling rack, in the pan, for ten minutes. Then flip, cover, and let cool.


I left the parchment on the bottom of the cakes for stability until we stacked them as the layers were quite thin.

While the Cakes were baking/cooling. We tackled the lemon curd.

LEMON CURD FILLING
We doubled the recipe found here.

3 oz. (6 Tbs.) unsalted butter, softened at room temperature
1 cup sugar
2 large eggs
2 large egg yolks
2/3 cup fresh lemon juice
1 tsp. grated lemon zest

In a large bowl, beat the butter and sugar with an electric mixer, about 2 min. Slowly add the eggs and yolks. Beat for 1 min. Mix in the lemon juice. The mixture will look curdled, but it will smooth out as it cooks.
This is not my picture, it's from the recipe, but it's good to know what it should look like!
In a medium, heavy-based saucepan, cook the mixture over low heat until it looks smooth. (The curdled appearance disappears as the butter in the mixture melts.) Increase the heat to medium and cook, stirring constantly, until the mixture thickens, about 15 min. It should leave a path on the back of a spoon and will read 170°F on a thermometer. Don't let the mixture boil. (AND DON'T LET IT SCORCH!)

This is not my picture, it's from the recipe, but it's good to know what it should look like!
Remove the curd from the heat; stir in the lemon zest. Transfer the curd to a bowl. Press plastic wrap on the surface of the lemon curd to keep a skin from forming and chill the curd in the refrigerator. The curd will thicken further as it cools. Covered tightly, it will keep in the refrigerator for a week and in the freezer for 2 months.

We used most of it for the cake, but some of it was left for snacking :

Finally the WHIPPED CREAM FROSTING!

It's just basic whipped cream: 2 cups heavy whipping cream, 2 tsp vanilla, 2 Tbsp sugar. 
But the recipe I used said to mix the ingredients in the bowl you'll use and let them all chill together for 30 minutes or so in the fridge. 
(Were I to do this again, I would make 3 cups worth of whipping cream.)

So we started stacking the cakes, purple on the bottom, red on the top. On each level we piped a circle of whipped cream to keep the lemon curd in, then spooned lemon curd into the center. 

Then we covered the whole thing in the whipped cream frosting. 

When you cut it, it looks like this:

And when you eat it, it looks like this (for about 30 seconds before you DEVOUR the rest of it) 

Seriously friends. This might be the best cake I've ever had. Moist, delicious, light and airy... Oh my YUM!


Monday, March 21, 2011

Star Wars Cookies

I (Rachel) am a huge nerd and absolutely love anything Star Wars. I have been pining over the starwars cookie cutter set from the moment I saw it. My wanting paid off when for Christmas my mom bought me the set! 


I'm going to be completely honest when I tell you mine did not turn out this cute. Due to my inability to count, I over mixed the royal icing and it turned out super thick. Lesson learned.As a heads up, this is an all day or two day project.

Here's the recipe:
Sugar Cookies
Ingredients
1 1/2 cups unsalted butter, softened
2 cups white sugar
4 eggs
1 teaspoon vanilla extract
5 cups all-purpose flour
2 teaspoons baking powder
1 teaspoon salt
- In a large bowl, cream together butter and sugar until smooth with hand mixer. Beat in eggs and vanilla. Stir in the flour, baking powder, and salt by hand. Cover. Chill dough for at least one hour (or overnight).
- Preheat oven to 400 degrees Fahrenheit . Roll out dough on floured surface 1/4 to 1/2 inch thick. Cut into shapes with your fancy Star Wars cookie cutters. Place cookies 1 inch apart on ungreased cookie sheets.
- Bake 6 to 8 minutes in preheated oven. Cool completely

My mom threw away my recipe (huge sad face) so I don't have the icing recipe. It's just your standard royal icing recipe...
On a side note, if you don't want to fork out the dough (haha) for these cookie cutters, the recipe works great with any cookie cutter. Valentine's Day, Christmas, Easter...Go wild! They don't spread out and turn into blob-like shapes as they bake. Here are my cookies :


Tuesday, March 15, 2011

Omelets a la Ziploc!

So once upon a time I went with my roommate for the weekend to her house in South Jordan. Saturday morning for breakfast she asked if I wanted omelets. I did, so we went to the kitchen. THEN she shared this amazing trick with me! She told me that her family does this for Christmas morning every year. It's so easy, and the easiest way to make omelets for a group that turn out perfectly every time with everyone getting exactly what they want.

Always looking for something to test on my dinner group, I decided to go for it, and according to my dinner group, it was a huge success.

Here's what you'll need:

I tried making it with off brand freezer bags once-- bad idea. Take my word for it. Get the quart sized Ziploc freezer bags. With the write on places it's perfect to keep everyone's omelet separate.
2-ish eggs per person-- 3 for the big eaters.
and then the fillings:
Diced ham
Bacon
Shredded cheese
Salt and pepper
Onions
Red Peppers
Mushrooms
Green Onions
Pretty much whatever you would put in a regular omelet.
You put all of the ingredients into the ziploc bag-- what ever you want, just seal up the bag and squish it all around.
While you are assembling your omelet in the bag, get a big pot of water boiling. Big enough for all the bags to fit into. (For dinner group I'll put a few big pots on to boil).

Then, just drop the bags into the boiling water. Set a timer for 15 to 20 minutes, and then poof! You have a perfectly formed, tasty, beautiful omelets. Yum!

I served it with orange-mango juice, hash browns, and a parfait (made with homemade granola!).

Look how pretty it is :)

And, check out the pie/cake, a pike, a pake?
Easy: You take a pie, bake it according to directions.
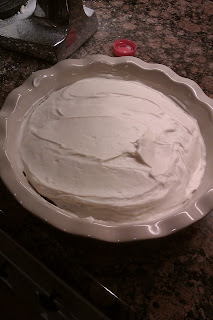
Put 1 3/4 cup cake batter (I used spice) in the bottom of a 9" cake pan. Squish the pie on top of it (you have to be careful for the transfer.)
Cover with more cake batter to cover the whole top.
Bake time on the box on a cookie sheet-- boil over is a definite option.
Frost and look how cool that looks! 
I know you want a bite (even if it is a little blurry).

Saturday, March 5, 2011

Guest Blogger: Amy's Triple Berry Red velvet Cake!

This is Amy: one of my BFF's.(isn't she gorgeous?) This summer she and I spent a lot of time together, a lot. 

This weekend she told me she was making a Triple berry red velvet cake with homemade cream cheese frosting. I told her if she took pictures I would put her on my blog, so here is her guest post:


One of the ladies in my Bible study just moved into a new house with her son, and monday we're going to have a potlatch (so strange that's said pot-luck!) and bless her house and I'm bringing dessert. Because I'm house-sitting (and the lady does NOT bake, therefore is missing MANY ingredients in her pantry!) I decided to do something semi-homemade (Please don't submit this to cakewrecks!)


I chose to do a Red Velvet Cake with Homemade Cream Cheese Frosting. Because I used a box mix, I spent a little more and bought the Duncan Hines Red Velvet Cake. My first issue was that she did not have a single cake pan! Are you KIDDING me?! Anyway, I wound up using two comparably sized glass pie pans. The box said to spray the pan AND dust with flour, which I did. I usually don't use cooking spray, I just use oil and coat the pan, but I figured with the flour it probably didn't matter. I used Crisco Olive Oil cooking spray and Unbleached flour in the pans.


Then I whipped up the cake mix. This lady has an old 70s Stainless Steel Sunbeam Stand Mixer (kind of cool!) The cake called for 1 1/4 C water, 1/3 C vegetable oil, and 3 large eggs, blend on low until moist, beat on medium 2 minutes


[ I, Emily, Just LOVE this picture-- Amy could be a food photographer! Don't you think?]


The recipe calls for it to be baked immediately, thankfully I'd already preheated my oven to 350, so I poured the batter between the two pie pans and popped them in her rather small wall oven. After 20 minutes I had to rotate the two pans because the outside edges were browning beautifully but prematurely. 


Before:

After:


Once they were done baking about 34 minutes total, I pulled them out of the oven and let them set for five to ten minutes before flipping them onto the granite counter and letting them cool. If you don't have granite or quartz this is NOT a wise idea, as there's red food coloring in the cake mix and it WILL stain laminate or solid surface or cement, it also stained my fingers, and on that note, wear an apron! As I didn't and well, my shirt showed it :) Thankfully I wore a black tank and didn't get any of the food coloring on my shirt.

Because I somehow didn't oil the pans enough, I didn't have to cut one layer level, the bottom fell off and it leveled itself. Oops? (Yay cake remnants for eating! Maybe.... I may actually work them into the recipe!) 


As they continued to cool, I whipped up cream cheese frosting, again using that super cool vintage mixer :) Here's the recipe. I doubled the original, so here's what I actually made :)

1 8 oz package Cream cheese softened
1/2 C butter softened
2 tsp vanilla
4 C powdered sugar
2-4 tsp milk to consistency

Beat cream cheese, butter, and vanilla on medium speed until light and fluffy. Gradually add powdered sugar, beating well. If necessary, gradually beat in milk to reach spreadability. 


Because I'm not at home and have no clue where to find a cake serving plate, I decided to use a decorative pie stone dish that was easily found, I put one layer of the cake in the bottom and generously frosted it.


Meanwhile I threw a pizza in the oven, a girl can't subside on cake batter and frosting fingers!


I then beautifully arranged blueberries, blackberries and raspberries on the frosting and gently pushed them into the frosting a little.


Next, I placed the top layer on and frosted the top and sides (also generously!) And then also arranged more of the berries on the top :) And quick pulled my pizza out because I forgot about it! 


Remember that broken cake I said might come back into play? Yeah, here it comes, I crumbled it up between my fingers and palms and just graced the sides/edges of the cake 


That's how I made a triple berry semi-homemade red velvet cake :) Now, I just need to figure out how to get it to the potlatch without ruining it.... But that's to be pondered later, I have a pizza to devour :) 
OH! Before I forget, put the cake in the refrigerator if you're going to leave it overnight and take it out an hour before serving.  Enjoy!

Thursday, February 17, 2011

Ahoy Matey!

I think you may have noticed, but I am just not very creative on my own... so I stole this idea from Family Fun: it is my go to for fun cakes. I modified a little, and was very happy with it. For dinner group there were two birthdays this week, so I made a cake! Our dinner group's theme is "Pirates of the Dinner Group," so what would be better than a PIRATE SHIP cake! That's right folks-- a pirate ship :)

I'd like to just put pictures up and let you marvel at them, but that would reduce the fun of this experience... so here's what you'll need:

  • 1 cake, baked in 2- 9" rounds
  • Chocolate frosting (family fun says 3-4 cups, but I made my own so I don't really know how much there was)
  • Chocolate wafer rolls (Pirouettes) (cannons) 
  • tootsie rolls (cannon base/barrels)
  • whoppers (cannon balls)
  • pirate action figure/lego/playmobile (I couldn't find one at the dollar store, so I actually used a wrestler who didn't have a hand, I drew on an eye patch and a beard, and cut off his leg. It served it's purpose)
  • Fruity rings/ peachios/life savers (for the port holes)
Make the cake according to directions, except to prevent it from being too fluffy I reduced the water to just 1 cup instead of 1 1/4. I read that idea on one of the reviews on FF and it was great. 
When the cake is cooled cut each round in half. 
Use frosting to layer the 4 halves together (as if you were making a 4 layer 1/2 cake) then wrap in saran wrap and freeze for several hours (I froze it while I was at work, and it was perfect and ready for me when I got home!) 

I trimmed the bottom off so that it would sit flat, or float flat... 
Cover the whole thing with chocolate frosting


Then all you have to do is decorate:
Use a butter knife to make planks on the side of the ship. I melted chocolate chips in a ziplock bag then cut off the corner so that I could pipe out railings onto parchment paper then freeze. I used bamboo skewers for the sails and turned the wrestler into a pirate. 
Note that because we're the pirates of the dinner group the cross bones are a spoon and fork! (the sails are made of parchment that was already out from making


Kevin turned 27 and Kim 23, so we fit 50 candles in the ship!

We had to open the door to keep the fire alarm from going off. Also... the action figure lit on fire... probably best to take it off prior to lighting the fire!

See the very burnt action figure? 

And boy it was delicious!